Warts and skin tags (known as “masay aur mohkay” in Urdu) are common skin problems that affect people of all ages. They may not be painful, but they can cause discomfort, embarrassment, and lower self-confidence — especially when they appear on the face, neck, hands, or underarms. Many people rush to get them removed through surgery or laser treatment, but these methods can be expensive, painful, and sometimes leave marks or scars behind.
The good news is that there are simple, natural remedies that can help you eliminate warts and skin tags from the root — without cutting, burning, or harsh chemicals. This article will guide you through a proven and affordable 7-day home treatment using safe ingredients you may already have in your kitchen. If followed correctly, this method can dry out and remove these skin growths painlessly, giving you clear, smooth skin again. Let’s explore how this powerful home remedy works and why it’s becoming the go-to solution for wart removal without surgery.
1. What Are Warts and Skin Tags?
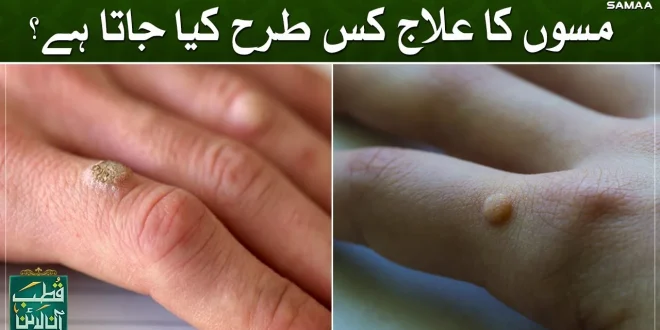
Warts are small, rough skin growths caused by a virus. They may appear in clusters or as a single bump. Skin tags, on the other hand, are soft, small pieces of skin that often appear in areas where skin rubs against skin or clothing — like the neck, armpits, or eyelids.
Both are non-cancerous, but they don’t go away easily on their own. Many people live with them for years, unaware that they can be removed safely at home.
2. Causes of Warts and Skin Tags
Warts:
Caused by the human papillomavirus (HPV)
Spread through skin contact or shared items
Common among children, gym-goers, and people with weak immune systems
Skin Tags:
Caused by skin friction
Common in overweight people, diabetics, or pregnant women
May also result from hormonal changes or genetics
3. Types of Warts and Where They Appear
Common Warts: Usually on hands, fingers, and knees
Plantar Warts: Appear on soles of the feet, often painful
Flat Warts: Smaller, smoother warts, often on face and legs
Filiform Warts: Long, thin warts, usually around mouth, eyes, or neck
Genital Warts: Found in the private areas — must be treated by a doctor
4. Dangers of Cutting or Scratching Warts
Many people try to remove warts or skin tags using scissors, blades, or sharp tools at home. This is highly dangerous. Doing so can lead to:
Infections
Bleeding
Scarring
Spread of the virus
Pain or skin damage
That’s why using a safe and natural approach is much better — and safer.
5. Why Natural Remedies Are Better Than Surgery
Surgical wart removal methods include cutting, freezing (cryotherapy), or laser. These are expensive, may require multiple sessions, and come with side effects like:
Skin irritation
Burns
Recurrence of warts
Healing time
Natural remedies:
Are pain-free
Cost nothing or very little
Can be done at home
Leave no scars
Target the root cause
6. The 7-Day Natural Treatment Plan
This method works by drying out the wart or skin tag, cutting its blood supply, and weakening its attachment to the skin. By Day 7, the wart either falls off or shrinks completely.
7. Ingredients You’ll Need
Castor Oil – known for healing and antiviral properties
Baking Soda – helps dry out the wart and kills bacteria
Apple Cider Vinegar – acidic, breaks down wart tissue
Cotton – for application
Band-Aid or medical tape – to secure treatment
Clean towel and warm water
All ingredients are easily available and safe when used as directed.
8. Step-by-Step Daily Routine
Step 1: Clean the Area
Wash the affected skin gently with warm water and pat dry.
Step 2: Apply Castor Oil + Baking Soda Paste (Morning)
Mix a few drops of castor oil with baking soda to make a thick paste.
Apply directly to the wart or skin tag.
Cover with cotton and secure using a Band-Aid.
Step 3: Remove and Reapply (Evening)
Remove the bandage.
Soak a cotton ball in apple cider vinegar.
Place it on the wart and cover it again with a Band-Aid.
Leave overnight.
Repeat this process daily for 7 days.
9. What to Expect Each Day
Day 1-2:
Wart or tag may feel a little tender or slightly darker.
Day 3-4:
The skin may look wrinkled. Wart starts shrinking or drying up.
Day 5-6:
Wart or tag loosens. The base becomes weaker.
Day 7:
The wart falls off on its own, or shrinks to nearly invisible.
10. Precautions While Using the Remedy
Do not rub or scratch the wart.
Do not apply paste to broken or bleeding skin.
Avoid contact with eyes or mouth.
Wash hands before and after each treatment.
If redness or burning occurs, take a break for one day.
11. Benefits of This Natural Treatment
No cutting, burning, or chemicals
No side effects
Zero cost if you already have the ingredients
Can be done at home, even during travel
Painless
Leaves skin smooth and clean
Safe for teens and adults
12. Tips to Prevent Warts and Skin Tags in Future
Maintain personal hygiene
Avoid sharing towels or razors
Keep your skin dry and clean
Manage your weight to reduce skin folds
Wear loose, breathable clothing
Boost your immune system with fruits, veggies, and sleep
13. Common Mistakes to Avoid
Using unclean hands to apply treatment
Forgetting to reapply the remedy at night
Picking or pulling off the wart early
Using the method for genital warts (consult a doctor instead)
Stopping after 1–2 days without giving it time to work
14. When to See a Doctor
While this remedy is safe for most people, consult a doctor if:
The wart is unusually large or painful
You notice bleeding or infection
The wart keeps coming back
The wart is located near sensitive areas (eyes, genitals)
15. Final Thoughts
Warts and skin tags may be common, but they don’t have to stay with you forever. With this simple 7-day home remedy, you can say goodbye to them — naturally, painlessly, and affordably. There’s no need for surgery, expensive creams, or risky home tools. Just consistency, clean hands, and a few ingredients from your kitchen can do the job.
Many people who tried this method reported clear skin within a week. But the key is patience and proper daily care. Follow the steps exactly, and within 7 days, you may no longer see the warts or skin tags that once bothered you